A Simple, Student‑Friendly Guide to Building Your First IT Home Lab
If you’re studying for CompTIA A+ or Network+, one of the best things you can do for yourself is build a small home lab. It doesn’t need to be fancy, expensive, or complicated. In fact, the most effective labs are usually the simplest ones, the kind you can set up in an afternoon with equipment you probably already have.
 Think of a home lab as your personal IT playground. It’s where you get to break things, fix things, experiment, and actually see how computers and networks behave. Reading about DHCP or RAM is one thing; configuring a router or installing an operating system makes it real.
Let’s walk through what a practical, affordable home lab looks like and how you can set one up without turning your living room into a data center. The goal here is to reinforce foundational concepts, not recreate a corporate network. So we’re keeping this simple and student‑friendly.
A computer that can run virtual machines will be the heart of your lab. You don’t need a powerhouse, but you do want something that can comfortably run a couple of virtual machines at the same time. This lets you install Windows, Linux, and other systems without needing multiple physical computers.
 Baseline: Quad‑core CPU, 16 GB RAM, 256–512 GB SSD, ability to run VirtualBox, VMware Player, or Hyper‑V
Your existing home router already gives you a lot to work with. Adding a cheap second router or a small switch opens the door to practicing real networking tasks. Used routers are perfect for this, they’re inexpensive and great for learning. Assigning IP addresses, Exploring DHCP settings, Testing Wi‑Fi configurations, Understanding NAT and routing are all tasks these certifications will expect you to understand.
A few ethernet cables and a USB ethernet adapter can go a long way in learning. Wireless networks are common today, but it is imperative that you understand wired networks also. With cables and an adapter, you can build small, wired networks, practice cable troubleshooting, observe link lights and connection behavior.
 Today’s mobile world has definitely found its way into the certification exams. If you have a smartphone or tablet available, it can help you test Wi‑Fi, explore mobile OS settings, and experiment with hotspots. Remember if you are using ones that you use daily, let’s not try your troubleshooting skills! Stick to exploring where you can find settings and understanding how they are configured on your system.
Some other optional but extras, not required, but they make your lab more flexible: a small PC repair toolkit, USB drives for bootable tools, a USB Wi‑Fi adapter, and free network simulators like Packet Tracer or GNS3.
Here’s a straightforward path to getting your lab up and running. You can follow this in order, or jump around depending on what you want to practice.
Step 1: Prepare Your Home Lab Computer
This gives you the foundation for experimenting safely.
Install VirtualBox, VMware Player, or enable Hyper‑V
Create folders to organize your ISO files and virtual machines
Download Windows installation media
Download a Linux distro like Ubuntu
Step 2: Build Your Virtual Machines,
Start with two VMs.
Windows VM to practice:
System settings
User accounts
Updates
Troubleshooting
Linux VM to explore:
Terminal commands
Networking tools
Permissions
If you’re feeling ambitious, a third VM to simulate a small network!
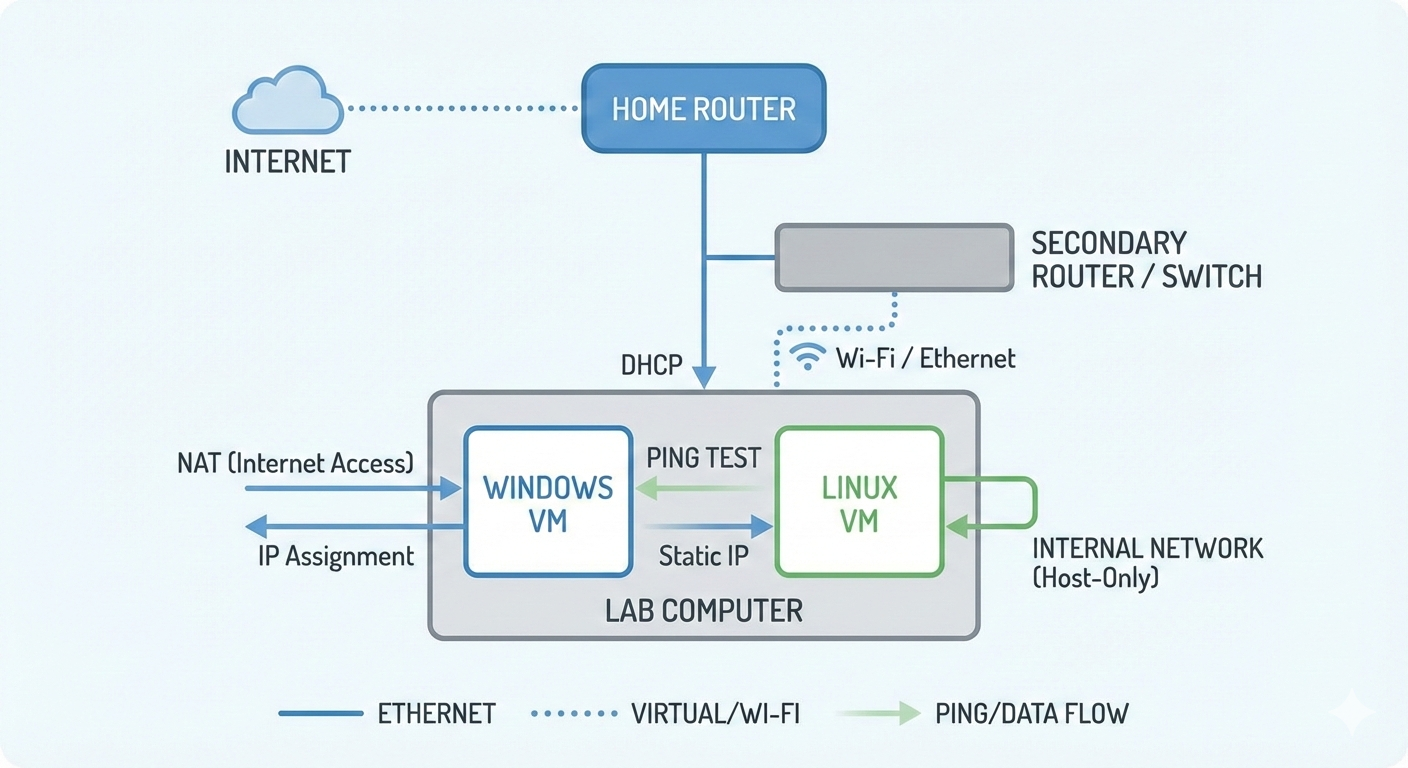
Step 3: Connect Your VMs to a Virtual Network. This is where things start to click. You’ll start to see how devices communicate behind the scenes.
Set one VM to NAT
Set another to “Internal Network” or “Host‑Only”
Assign IP addresses
Test connectivity with `ping`
Step 4: Set Up Your Physical Network Gear and bring in your extra router or switch. This gives you real‑world experience with the same tools used in IT support roles.
Connect it to your home router
Log into the admin page
Explore DHCP, Wi‑Fi, and security settings
Try assigning static IPs to devices
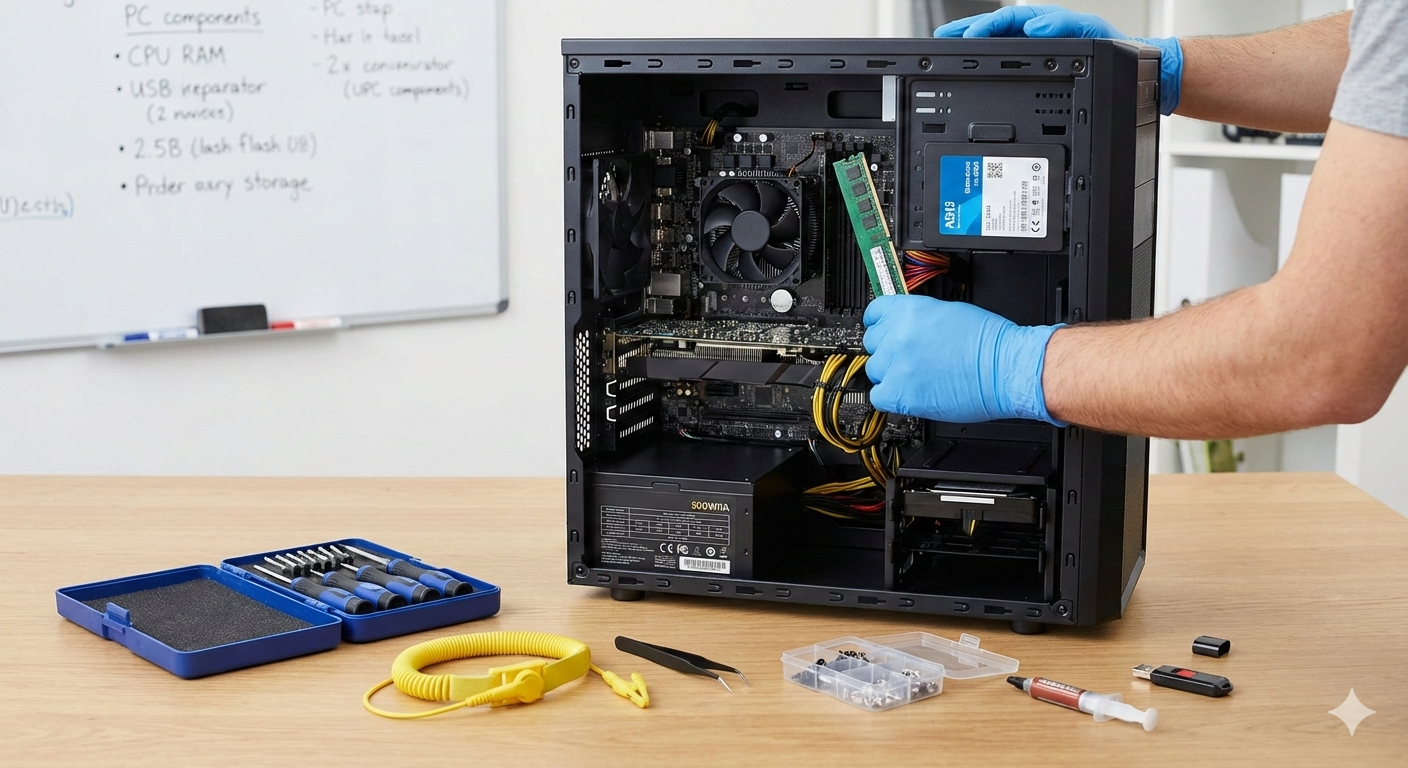
Step 5: Practice Hardware Skills. If you have access to a desktop or older laptop, this is your chance to get hands‑on experience with classic A+ skills that are easier learned by doing.
Opening the case
Identifying components
Removing and reinstalling RAM or storage
Cleaning dust safely
Step 6: Practice troubleshooting. This is where the fun begins, intentionally break things (safely) and fix them. It allows you to walk through the troubleshooting process to resolve it.
Examples:
Disable a network adapter
Change an IP address incorrectly
Uninstall a driver
Fill a disk to 100%
Step 7: Explore security basics. A few simple exercises can go a long way to being comfortable with security for both A+ and Network+ concepts.
Enable and configure firewalls
Create user accounts with different permissions
Review router security settings
Test password policies
Step 8: Document Your Lab. Many don’t, but the techs with the best success have good communication and documentation skills. Keeping notes helps you study and builds habits you will use on a help desk or in the field. It helps you explain what and why was done to fix an issue.
More difficult issues may require multiple techs and an understanding of the overall network, not just an individual system.
Keep notes on:
Network diagrams
IP addressing
VM configurations
Troubleshooting steps
Building a home lab isn’t about having the newest gear or recreating a corporate server room, it is about giving yourself a safe, hands‑on space to learn, experiment, and grow. Every cable you plug in, every VM you configure, every problem you troubleshoot builds real skills that translate directly to the A+, Network+, and the IT roles that follow. Start small, stay curious, and keep exploring. The more you tinker, the more everything you’re studying will start to click.
Talk to you next week!